
Tuesday, September 20, 2016
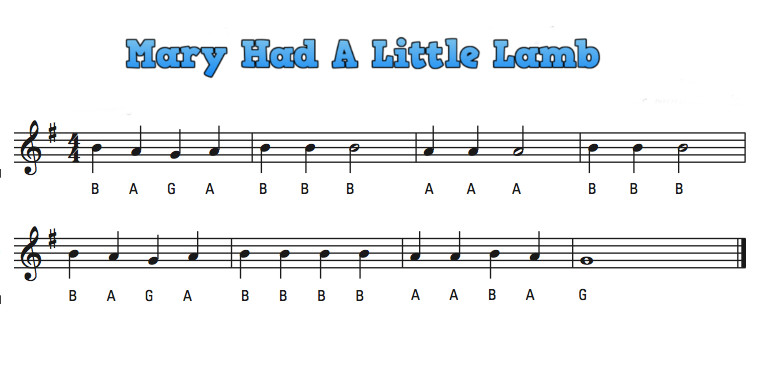
9. Flute first notes B, A, G : Mary Had A Little Lamb
Below is the muss sheet for Mary Had A Little Lamb. It uses only the 3 notes we learnt from the previous blog, i.e. notes B, A and G.

Sunday, September 18, 2016
8. Flute Home Keys and First Notes : B, A, G
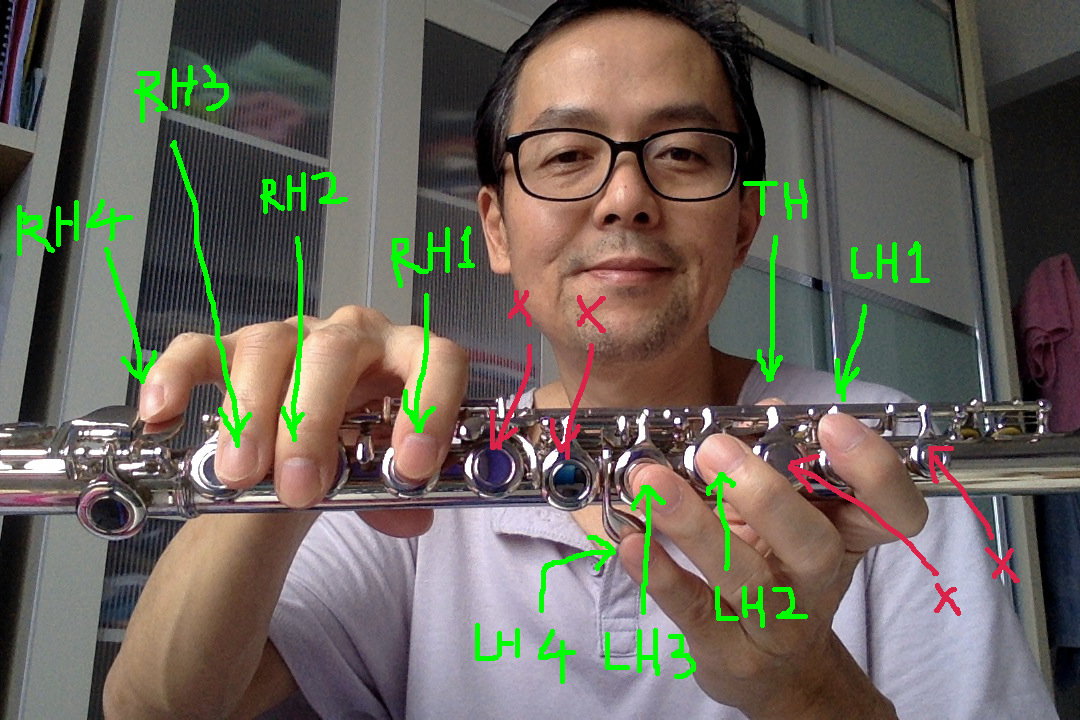
Below are the home keys for each finger. Note that the red X keys are not pressed.

LH1 = Left hand first finger (index finger)
LH2 = Left hand 2nd finger
LH3 = Left hand 3rd finger
LH4 = Left hand 4th finger (pinky)
RH1 = Right hand first finger (index finger)
RH2 = Right hand 2nd finger
RH3 = Right hand 3rd finger
RH4 = Right hand 4th finger
X = These keys are not pressed
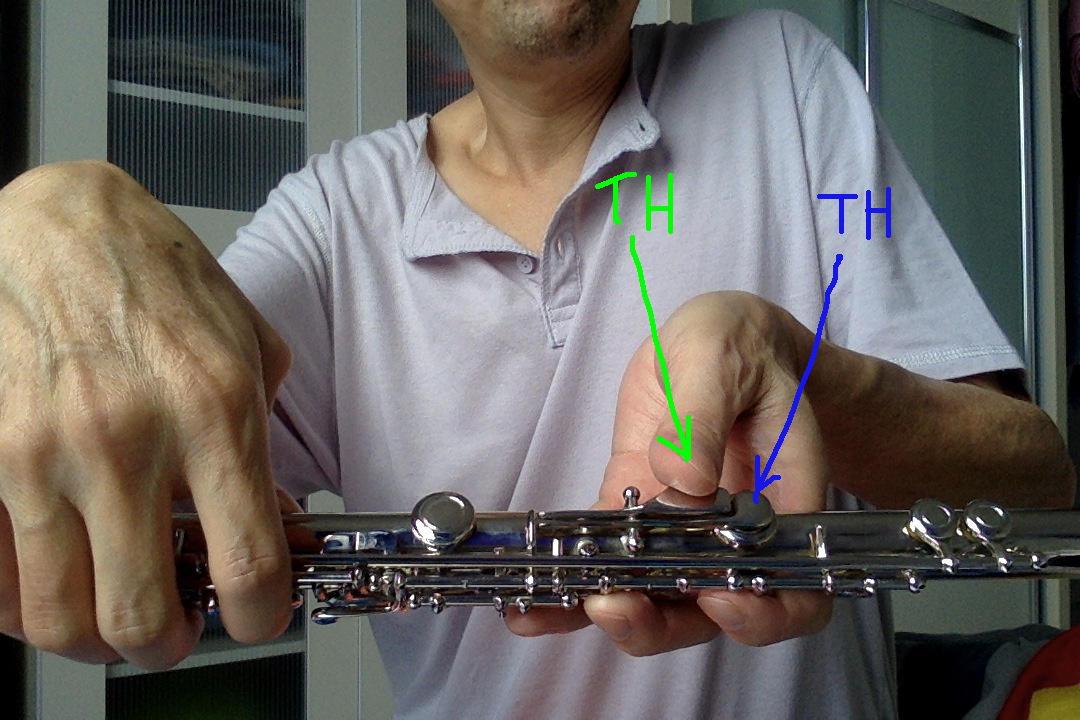
The pic below shows the right hand thumb home key. Note that the one in green is the main home key. The one in blue is the Bb key. We will be using it later. For now, we will use the one in green.


The abbreviations are as follows:
TH = Left hand thumb
LH2 = Left hand 2nd finger
LH3 = Left hand 3rd finger
LH4 = Left hand 4th finger (pinky)
RH1 = Right hand first finger (index finger)
RH2 = Right hand 2nd finger
RH3 = Right hand 3rd finger
RH4 = Right hand 4th finger
X = These keys are not pressed
The pic below shows the right hand thumb home key. Note that the one in green is the main home key. The one in blue is the Bb key. We will be using it later. For now, we will use the one in green.
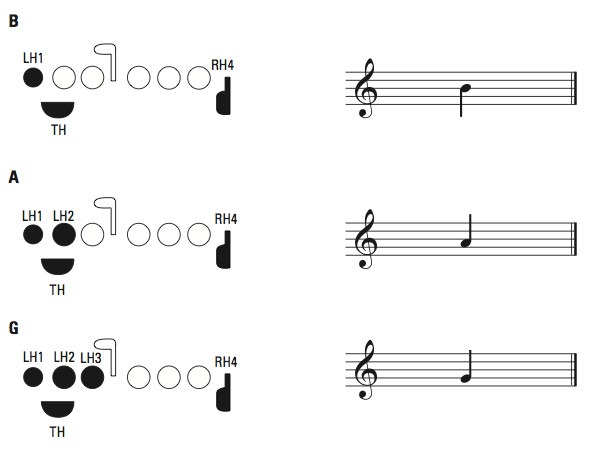
The next pic below, shows the fingering chart for the notes B, A and G. Note that the red keys marked as X is not shown in the fingering chart.
7. How to hold the flute
Below is a picture showing the balance points:

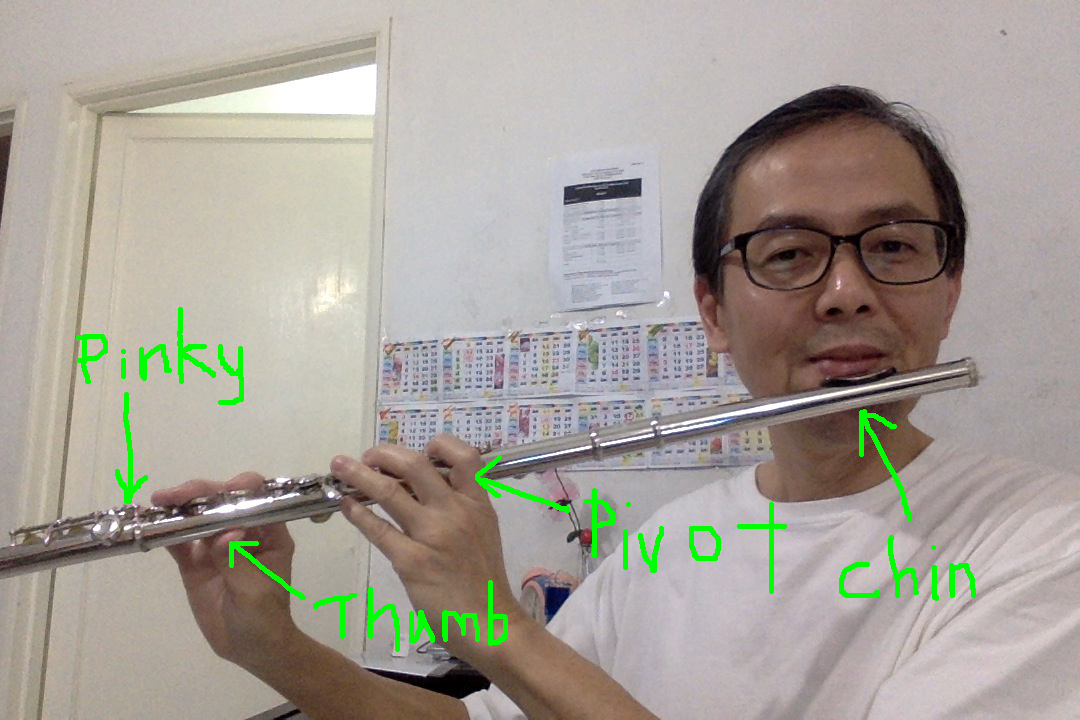
The flute sits on the base of the left index finger. This is the Pivot point. The entire flute "rotates" around this pivot point. The right Thumb/Pinky fingers pushes forward. This causes the lip plate to push into the chin.
Thursday, September 15, 2016
6. Assembling the flute and marking the head joint with stickers
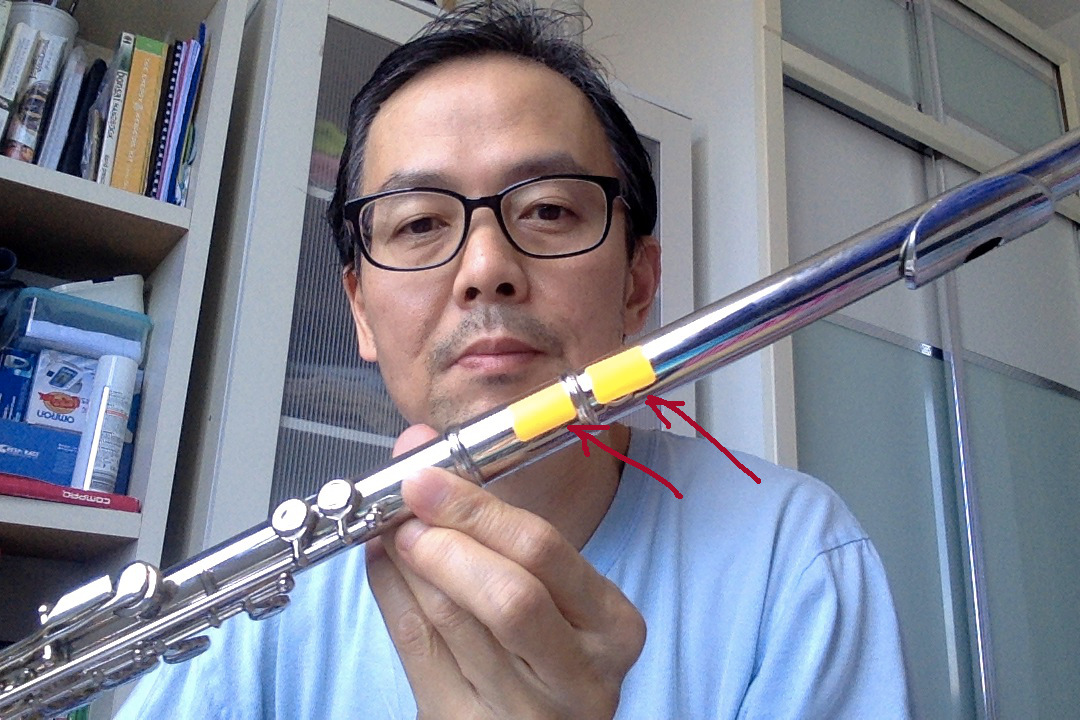
Below is a picture showing how I align the front edge of the embouchure hole with the centre of the first key. Note the green line.


Below are the labels that I paste on the flute to mark the alignment. Note the red arrows.
Wednesday, September 14, 2016
5. How to do articulation on the flute
Articulation gives a clearer note. And it also defines the start of the note. To do articulation ( also known as tonguing ), say the syllable "TU", but without making any sound.
The diagram below shows the shape of the lip opening when playing low or high notes. Referring to the above, when playing low notes, the lip opening is bigger and when playing low notes, it is smaller.


The diagram below shows the shape of the lip opening when playing low or high notes. Referring to the above, when playing low notes, the lip opening is bigger and when playing low notes, it is smaller.
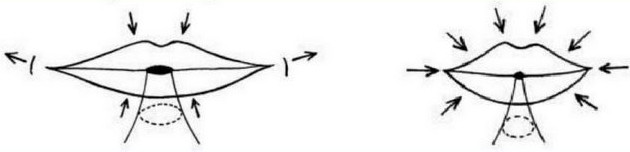
In the diagram below, when you play higher notes, you need to pout your lips slightly and this brings the lower lip forward and covers more of the embouchure hole.

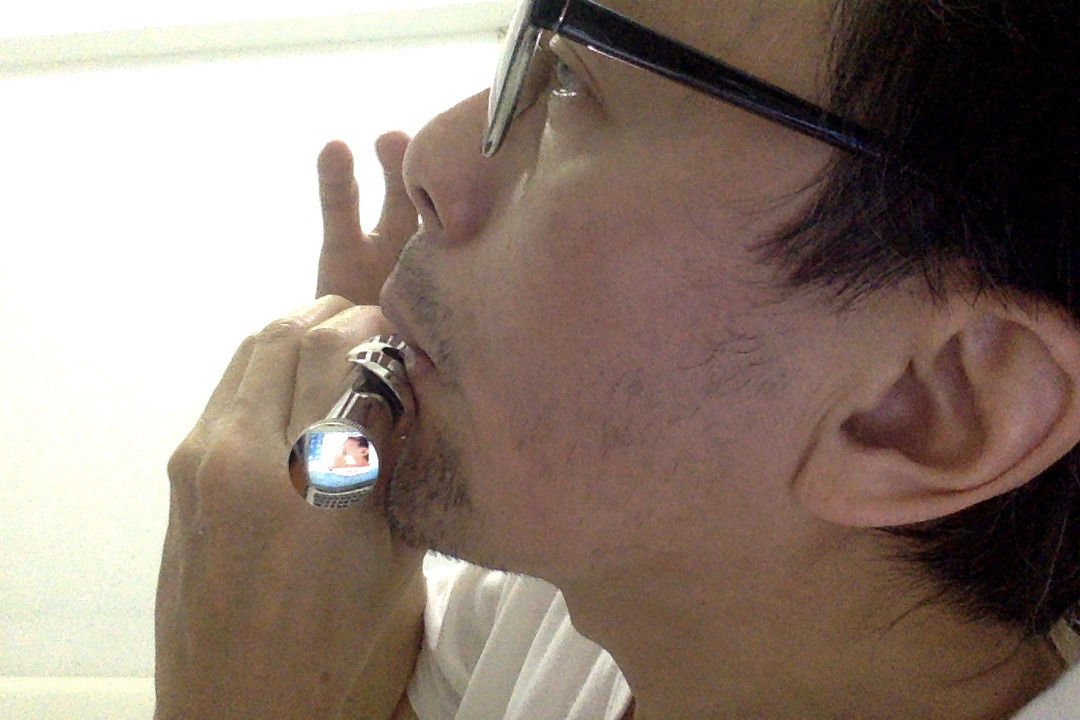
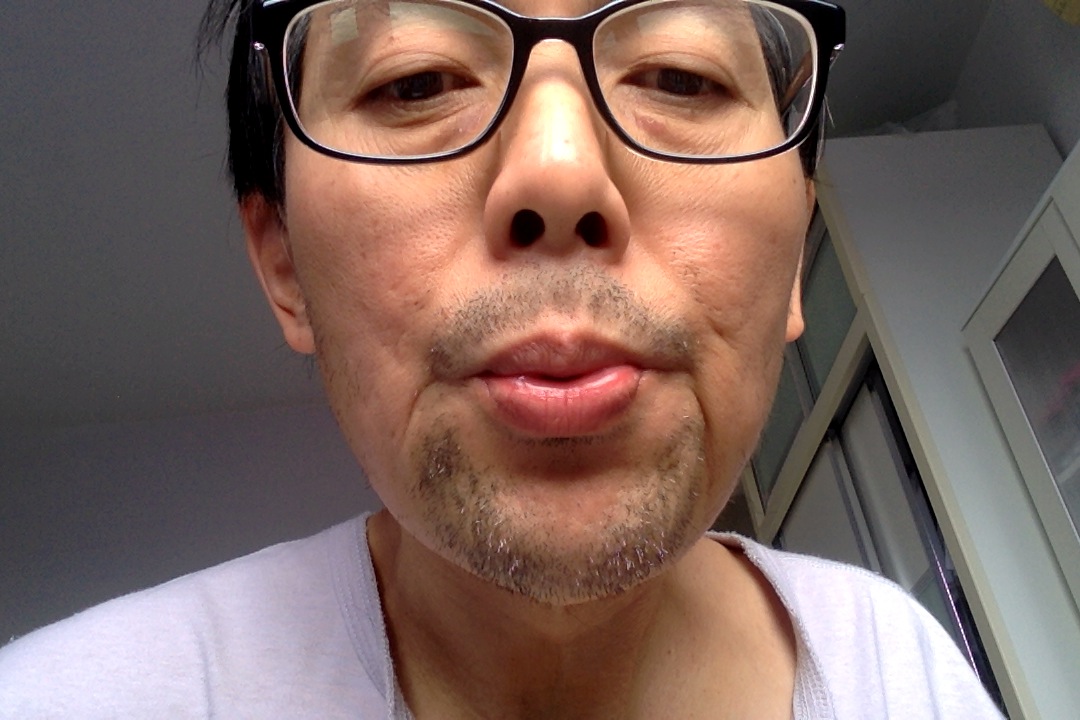
In the picture below, this is what it looks like when playing low notes. To play a low note with articulation, say the syllable "TU" to start the note, then continue blowing. Note that the embouchure hole is about 1/2 covered by the lower lip.
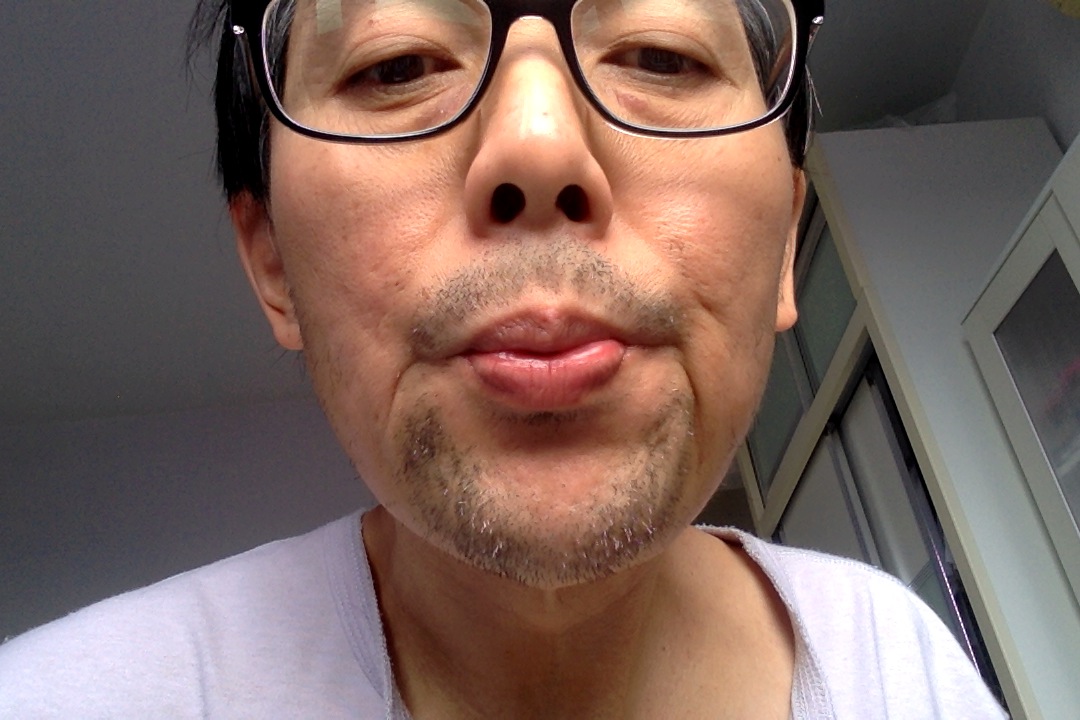
In the picture below, this is what playing a high note looks like. To play a higher note with articulation, pout the lips (pushing it out slightly), then make the syllable "TU" to start the note and then continue blowing. This will automatically cover more than 3/4 of the embouchure hole.

Tuesday, September 13, 2016
4. Flute embouchure for playing high notes
Below is the embouchure for playing low notes:

Next is the embouchure for playing high notes:

Next is the embouchure for playing high notes:
Note that the lips are more compressed and the opening in the lips is smaller. This creates a faster jet stream which is necessary in order to produce a higher pitch.
Subscribe to:
Posts (Atom)